We currently have a Whistler (Stanley/Genie series) UT351 screw drive garage door opener and it has been in need of some repairs. Since the garage door opener has been rock solid reliable, and it’s connected exclusively to a HomeKit Garage Door Controller Accessory that I developed (so all garage door commands are sent encrypted through HomeKit), we decided that it’s best to repair the opener that’s worked for so long rather than gamble on a new brand.
We repaired the motor coupler… However, there was another issue: all of the limit switches broke so they were being held to the track with a sophisticated mechanism of duct tape and carpet tape. This worked pretty well, but was becoming slightly problematic occasionally and required readjustment. Pretty problematic since if the limit switch slips, then the door will slam into the opener or into the ground with pretty decent force. We decided it’s time to replace these limits witches.
The issue: discontinued
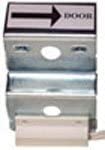
When we spoke to some garage door part distributers and discussed the parts we required, we were informed that limit switches are no longer produced for our garage door. We were able to find someone who sold, what was supposed to be, drop in replacement limit switches for our model. These are the Stanley-compatible Limit Switches (Part #36850). We ordered two of these and thought we were golden
Surprise 2: our limit switches are wired together
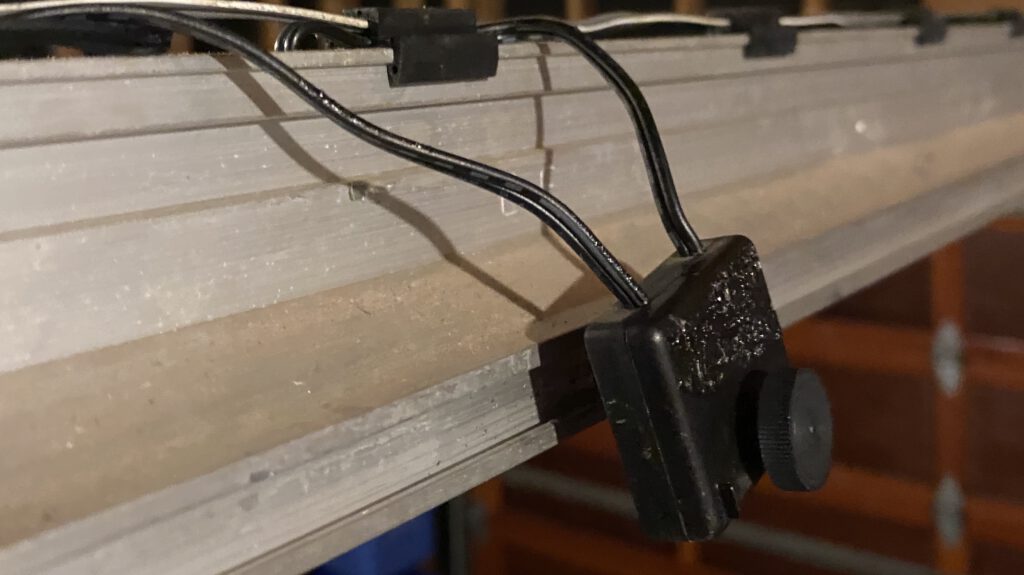
This one surprised us during the switch. Our limit switches are wired together in sequence and not independently wired back to the opener (i.e. one wire proceeds down connecting both limit switches, with only one wire returning to the opener from the closing limit switch). We thought maybe this was expected, so we installed both switches in place of the existing wires.
Plugged the opener back in and: surprise surprise… the opener started throwing an error indicating the limit switches were not connected. This made sense since the circuit would have to be completed for the opener to function properly, and this method of installing did not make that happen. The circuit could never complete since the reed switches would never be pulled closed at the same time.
The fix: resistors to the rescue!
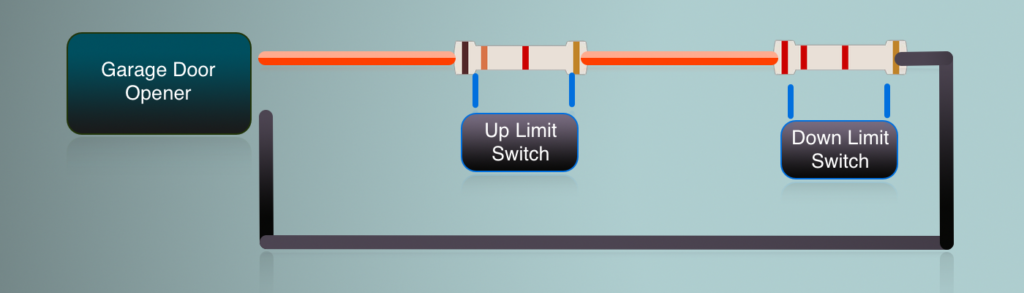
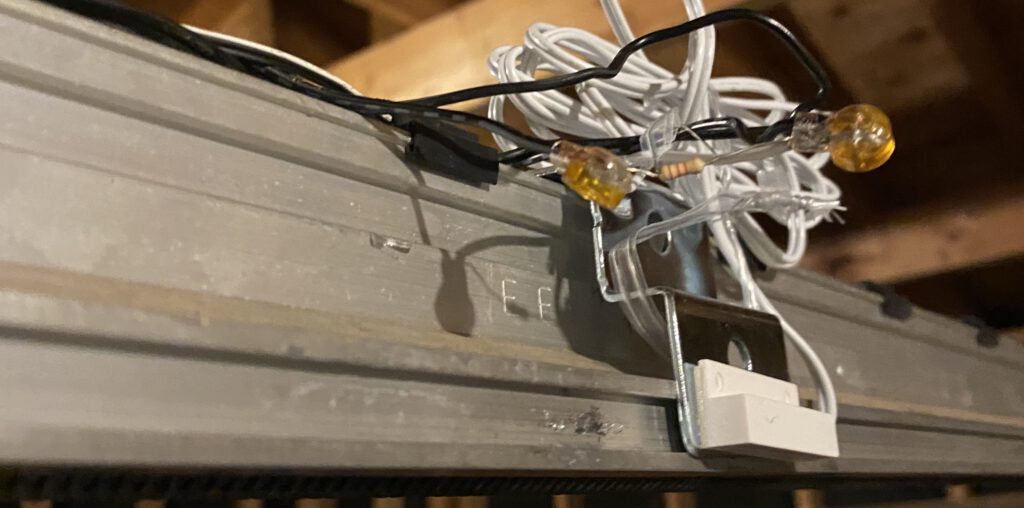
To get these limit switches working, we’d need to complete the circuit by adding resistors to both limit switches between the wire coming into the limit switch and heading onto the next switch (or the opener in the case of the down switch).
We used 5% resistors: 1.3k Ohms (first/up limit switch) and 2.2k Ohms (last/down limit switch). Rewiring is pretty simple:
- Connect the wire from the garage door opener into the first/up limit switch lead wire. Also connect the 1.3k Ohms resistor to this wire connection that’s just been made.
- Connect the last wire of the first/up limit switch to the existing wire heading to the second/down limit switch. Also connect the 1.3k Ohms resistor to this wire connection.
- Connect the wire from the first limit switch into the second/down limit switch lead wire. Also connect the 2.2k Ohms resistor to this wire connection.
- Connect the last wire of the second/down limit switch to the existing wire heading back to the garage door opener. Also connect the 2.2k Ohms resistor to this wire connection.
Hopefully this assists in wiring new limit switches to the the older screw-drive Whistler/Stanley/whatever other brand they sold this UT351 opener under. Remember: you’ll be using the existing wire coming from the garage door opener to the first limit switch, and the existing wire going from the final limit switch back to the garage door opener. Keep that in mind when cutting the old cable and using the crimp connectors. Make sure both wires in the new limit switches have a resistor that ensures the circuit can always complete.