Category: Silly Ramblings / Other

  • Migrating to Backblaze B2

    Earlier this year, my attention was drawn to alternative options to Amazon S3 for both user content storage (and delivery) and server backups. I’ve been using AWS (and S3 in particular since 2015) with great success and have continued to adopt it as my go-to object storage provider. Overall, I can count the number of issues I experienced with AWS on one hand.

    Alternatives!?

    I’ve been pointed to AWS alternatives plenty of times, but nothing ever seemed enticing enough to actually make the effort to switch (given my success and overall happiness with AWS). The desire to switch was lessened even more by the lack of compatibility in API calls. I noticed a lot of S3 competitors (such as Bunny) were focussing more on egress costs as well, which is important in a couple of my use-cases. These changes in the market are what finally convinced me to seriously begin researching alternatives and begin the initial decisions of whether switching is a task worth undertaking, or just moving to alternative services with new projects of mine.

    This decision to seriously look into the options was solidified when I realized that most of the major object storage options out there from all the major providers offered an S3 compatible API, significantly reducing the transition time for my projects (and even requiring no end-user update to make the switch). I decided that an S3-compatible API is absolutely mandatory for me to consider the object storage offering. This would give me the opportunity to make the transition quickly and with little change to my code, which provides an easier pathway back to S3 if I deem it necessary.

    Why Backblaze B2?

    I reviewed offerings from across numerous providers that offered an S3-compatible API (either partial support for most functionality, or full– with an obvious preference for full). As far as cost-effectiveness goes, which was important to me, Backblaze was the clear leader in my research. Backblaze also offered relatively cost-effective egress, and great partnerships with CDN companies for those projects that do have heavy outgoing usage. As dependability goes, B2 is a relatively new product; however, Backblaze appears to have been in the backup business for quite some time with an impeccable track record and a great relationship with customers. Additionally, B2 offers redundancy solutions that would check all the boxes I need checked.

    Other offerings couldn’t compete with Backblaze’s straight-forward pricing model, which is very clearly explained and doesn’t seem designed to confused, which is a nice change from the usual confusing class pricing model. Egress partnerships make this a very attractive offering for high-egress projects.

    Finally, the last requirement for my decision was S3 API compatibility. Backblaze B2 seemed reluctant to offer one at first due to additional costs; however, they appear to now not just offer, but encourage the use of their S3 API over their B2 API. Backblaze’s S3 API seems to be much more complete than a lot of competing offerings. Backblaze also offers some great versioning options with great control, very similar to S3’s feature-set.

    Overall, Backblaze B2 checked all the right boxes. Particularly when it came to user engagement and feedback acceptance. Backblaze seems to have a very public presence online and provides updates on upcoming roadmap items, as well as answering questions and concerns publicly and honestly. I have a high affinity for companies that take pride in their offering and actually act like customers exist and deserve to be heard. It was nice to see real responses rather than canned “create a ticket” answers.

    How’d it go?

    At the time of writing, I have now almost fully divested from S3 and am utilizing Backblaze B2 for most of my object storage needs. In retrospect, it was a very wise move and I was able to switch to a company that seems to care about their users (good for me and my users as well), and I was able to cut down my costs significantly while maintaining high availability and performance. While I’m still making modifications to my CDN providers for the best egress: Backblaze has proven to be a rock solid drop-in replacement for S3. Migration was also simple and quick with a relatively low startup cost for the migration (yes, my first months bill was higher than subsequent months due to transaction costs associated with the initial transfer).

    Overall, I’m thrilled that companies are deciding to offer cloud services and venture into providing these on a more cost effective, customer-focussed, and innovation-driven basis. I’m happy with this switch and I cannot wait to see further innovations in this space.

    It’s important to note that my decision to switch object storage providers was not motivated by issues with AWS S3 (as mentioned earlier, I’ve had almost no issues with AWS services). I’m grateful for the innovation and solutions that AWS has brought to the IT industry, and I was a very happy customer for years (even using them for HIPAA/PIPEDA compliant medical record backups).
  • Starlink for RV: Our experience

    Entertainment while camping has always been at the front of our mind when considering upgrades to our motorhome. We’ve been using a few different options for RV internet, but none of them really offered a seamless experience.

    I’ve been following Starlink since their announcement, since I always believed that it had the real potential to be a game changer in the RV world. Our order was finally fulfilled in February 2022 and we began using it at home prior to the camping season. Shortly before our camping season began: Starlink offered the ability to convert residential services to RV, which would allow us to pause and resume service as desired. This was a perfect fit for us!

    Starlink Terminal

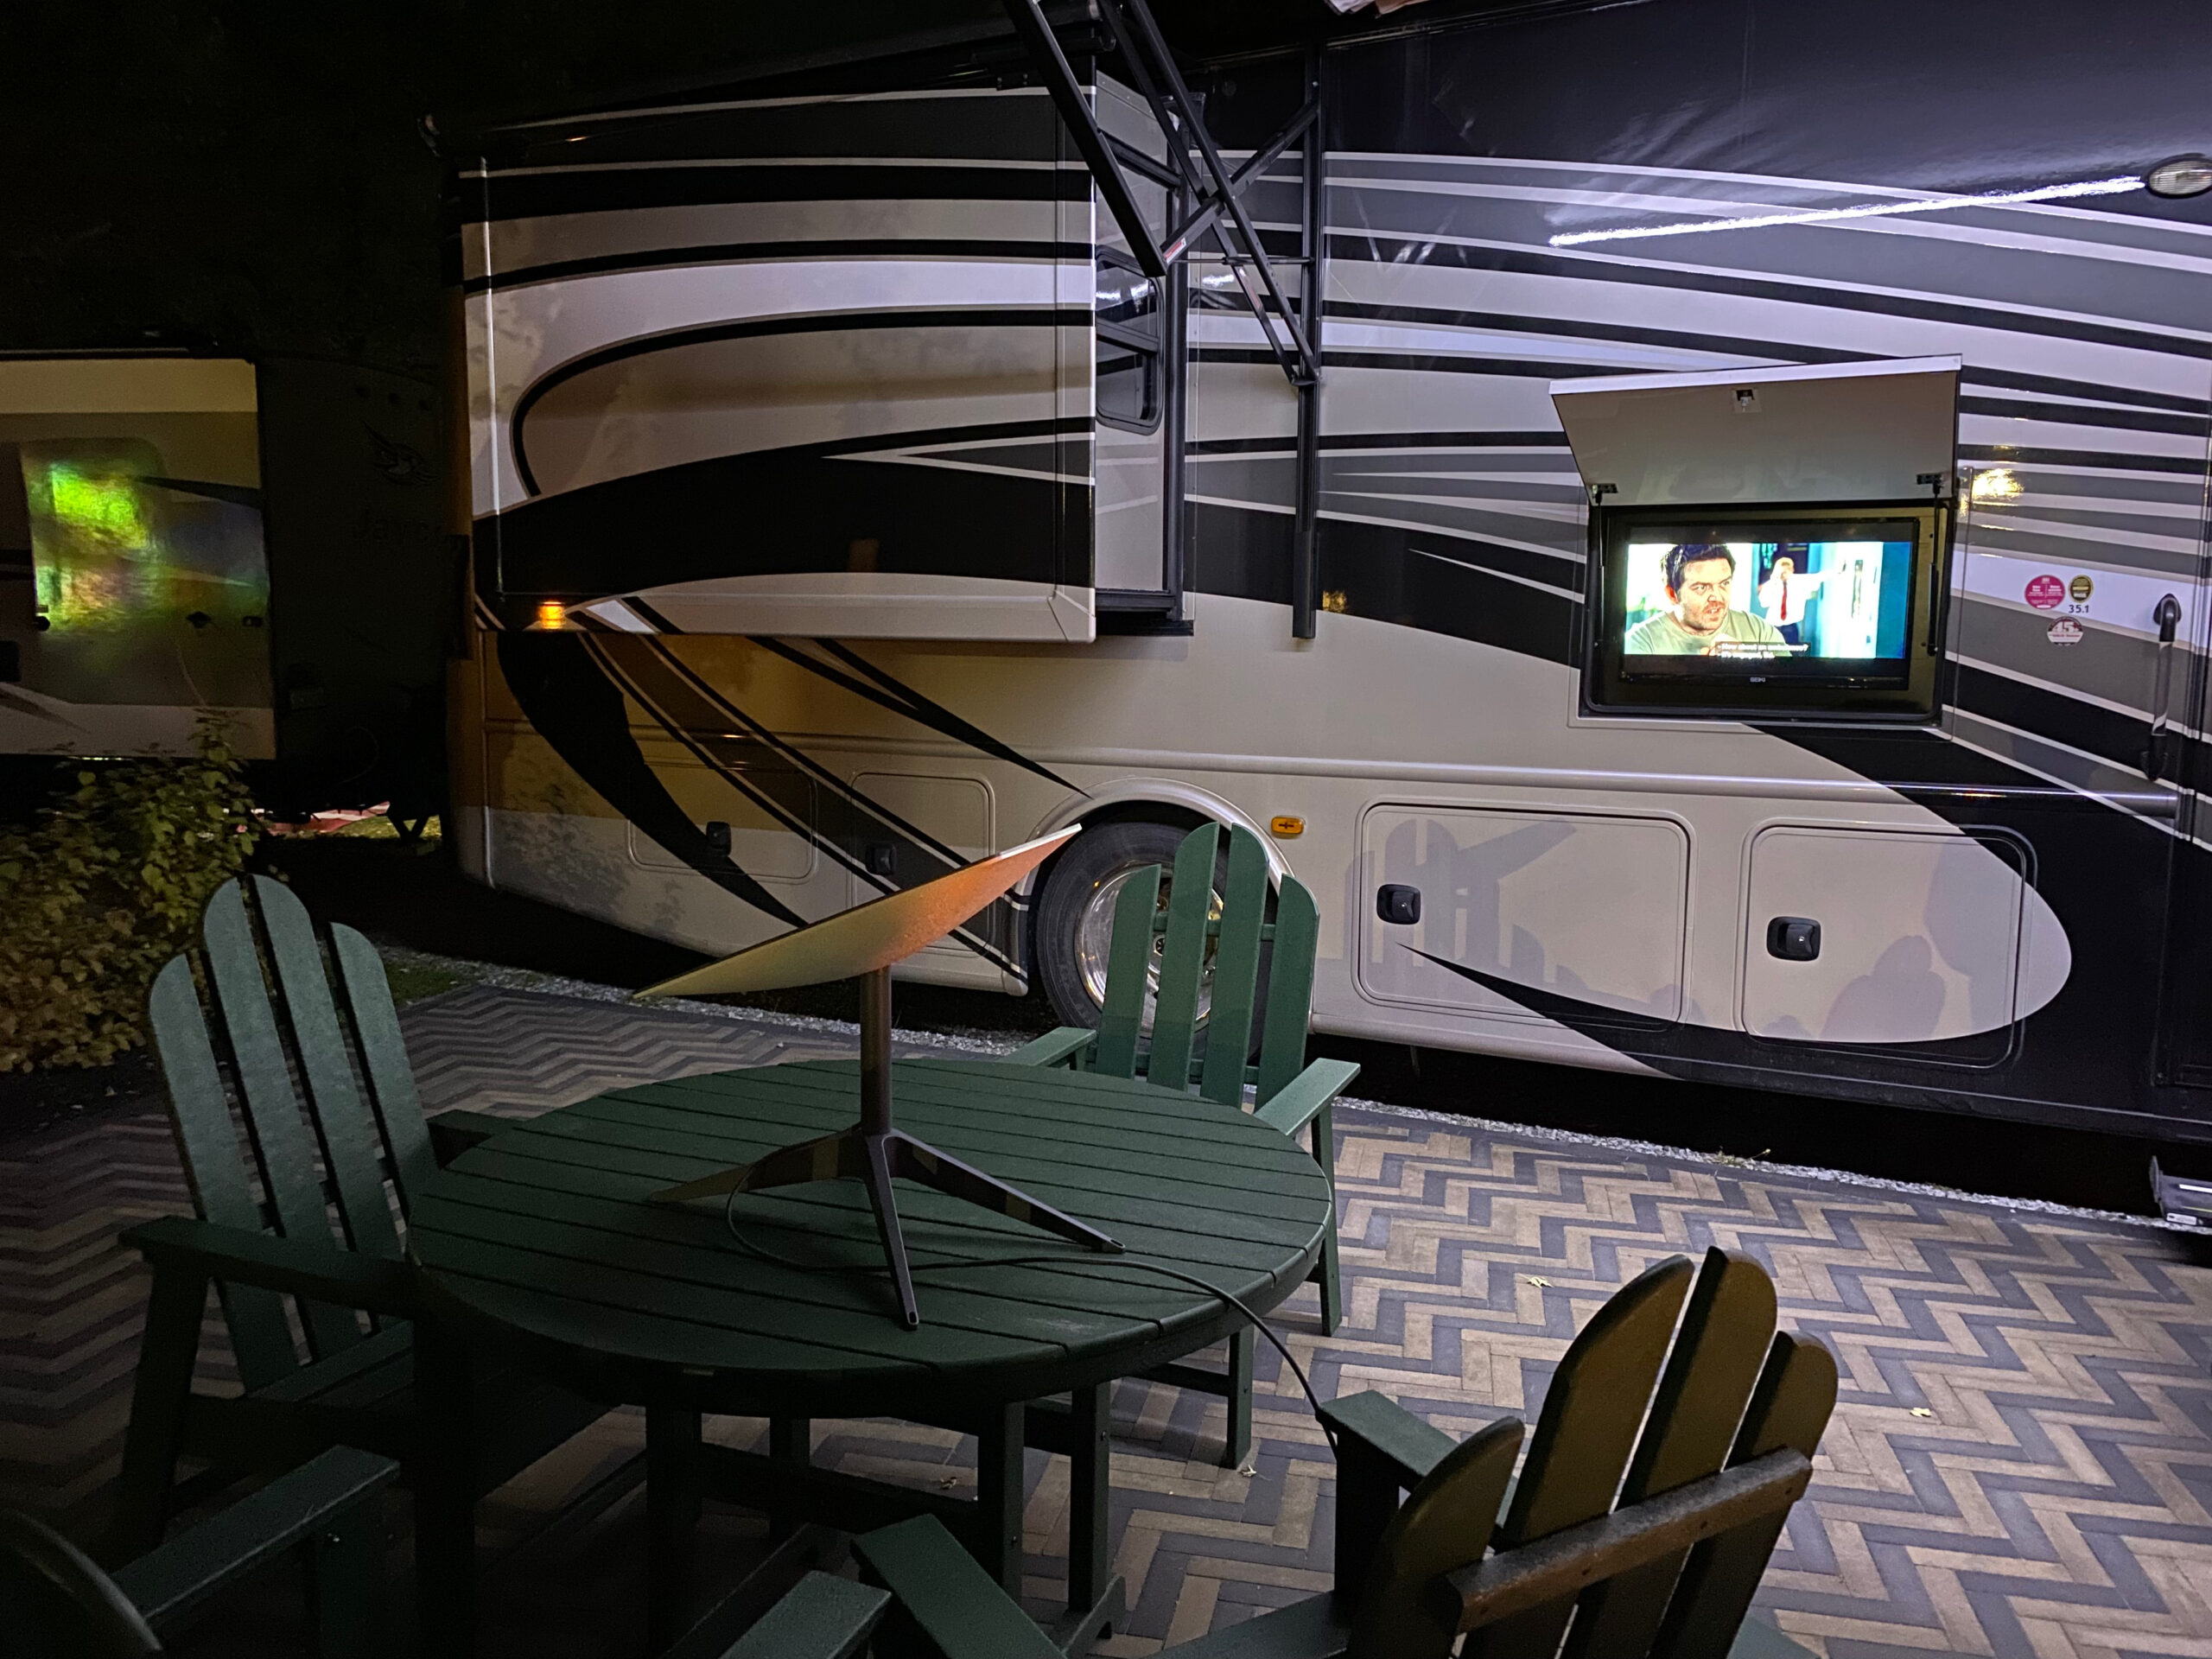
    I was very happy to receive the rectangular Dishy (Starlink Terminal), since it meant that it was easier to store. We got our RV dealer to install an access port to a bay that would house all our networking equipment. We actually prefer the mobility of the current user terminal rather than one that is permanently mounted on the roof. A roof-mounted terminal, while convenient, will start to dictate where and how we park our RV.

    We use the Starlink router in bypass mode and connected it to some Ubiquiti equipment using the ethernet adapter (yay dongles). Since our inverter powers all onboard outlets when shore power is gone, it means that we have Wi-Fi even during power outages.

    We also grabbed Starlink’s official storage case and it’s been perfect for storing Dishy.

    Performance

    We camp relatively close to major cities in most cases, so we are typically using cells that are occupied by rural users living slightly outside urban centres. We’ve also camped in very urban environments. According to the capacity map from Starlink: we are almost always in “Low Capacity” areas, meaning that our expected speeds could be as low as 5Mbps download. We were okay with this, since 5Mbps should still stream HD.

    We were also a little worried about tree cover, but we’ve only found one site that gave us even a slight amount of trouble with trees. Typical campsite tree obstructions don’t appear to be impactful to normal streaming. I suspect that connections that are more sensitive to hiccups or complete drops might have a bit of trouble if tree cover is extreme. In our case though, trees don’t seem to be giving us any trouble.

    Full speed ahead

    Starlink has outperformed our expectations during the entire camping season. It absolutely feels like our terrestrial home internet connection. Nothing about Starlink feels like a typical satellite internet experience (reminds me of when Royal Caribbean first launched Voom and it felt closer to a land-based connection). Websites load fast, videos stream immediately, and all of our Apple TV’s respond insanely fast when streaming.

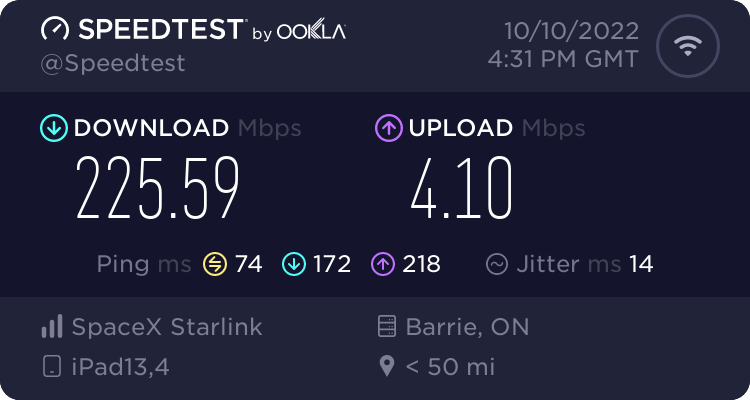
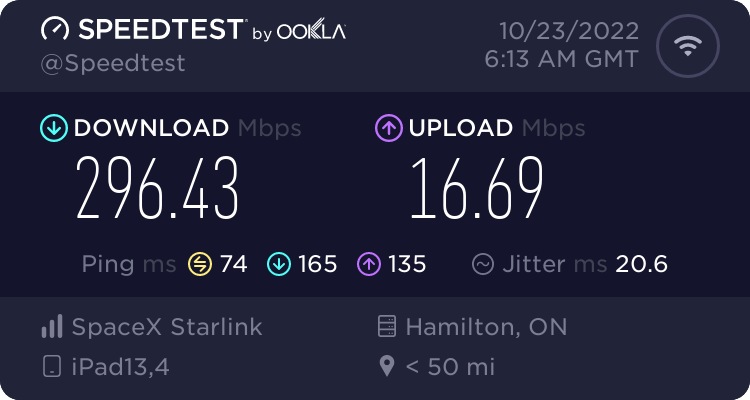
    Our average speed over the camping season has probably been about 125Mbps down / 8Mbps upload. We frequently see over 150Mbps download in several areas. Latency is usually ~40ms-~80ms depending on the destination. US destinations typically have much lower latency than Canadian destinations.

    On several occasions, we can usually get over 200Mbps download, but our sustained download is usually around 150Mbps. I’ve downloaded (and uploaded) massive server backups, performed typical cloud operations, and did basically everything I’d do at home.

    Streaming Gaming (GeForce NOW)

    After streaming HD movies on our Apple TV’s in the RV and noticing the relatively low latency to US destinations: I decided that the numbers I was seeing in Speedtests were actually meeting (or exceeding) the requirements for a stable GeForce NOW session. I decided to put that 3080 tier membership to use and give it a shot.

    I was pleasantly surprised to find out that GeForce NOW was able to carry a 4K gaming session at 120FPS pretty much flawlessly. No disconnections and smooth gameplay. There was the occasional hiccup during my gaming session, which I attributed to slight satellite gaps or the switching between satellites (although it could just have easily been anything else like general networking hiccups).

    It certainly didn’t grant me the same flawless experience that my home connection gave me; however, it was a relatively smooth experience. It’s also nice to know that I have the option to fire up a game using GeForce NOW while camping.

    Final Thoughts

    Starlink for RV was probably one of the best investments we’ve made for our RV. We (like most people) are heavily using internet connected services that are thirsty for a lot of data. We also like having the conveniences of home in the RV, so being able to add the Apple TV’s to each TV in the RV to just grab a remote and browse/stream is a huge benefit.

    Ultimately Starlink for RV has done exactly as it has promised. Every time we setup Starlink at a new site, it performs flawlessly without any effort. We haven’t had so much as a hiccup while camping with Starlink. Our speeds constantly rise above 200Mbps and always support smooth HD streaming without buffering, despite us being inside “low capacity” areas on the map.

    I’d recommend Starlink for RV any day to anyone looking for mobile internet service while camping. I’ll continue to update this blog with new posts about how the service is performing for us.

    Thank you to Elon Musk and the entire SpaceX/Starlink team for creating and maintaining this service. It really is out of this world (pun-intended) and we hope to be a customer for a long time. It’s also rare that something gets announced and actually makes its way to market as fast Starlink has.

  • Ubiquiti AMPLIFI Alien: HomeKit bliss?

    HomeKit Home with 120+ accessories
    Our HomeKit home has grown to over 120 accessories and we needed a Wi-Fi router that could keep up

    I’ve been a pretty big fan of Apple’s AirPort lineup since around 2008. I’ve used the 802.11n Extreme’s and I’ve had two Time Capsule’s (the 802.11n and the last model in production: the 802.11ac tower). They’ve performed flawlessly at home and even in some small business environments. I’ve always been happy with them and they were one of the first consumer routers I’ve encountered that worked reliably without the need for any reboots or weird configuration changes.

    As I added HomeKit devices to the network, the 802.11ac Time Capsule handled everything like a champ. All devices stayed connected and were rock solid (and fast)… However, I had noticed that one of my IoT devices was showing a Wi-Fi issue. It only connects periodically, so I figured it was some interference at the moment it tried to connect. It wasn’t able to connect when I tried to manually connect it. I tried to reset it and input the Wi-Fi information again (thinking it was some sort of bug on the IoT device) to no avail. Then I realized that the number of devices on the 2.4GHz band was likely approaching some limit. I opened AirPort Utility and counted the 2.4GHz devices and sure enough: 32 devices on the 2.4GHz band. The 2013 AirPort Time Capsule must have a 32 device limit per band. This is when I made the decision to finally retire the AirPort in favour of a more modern router.

    Hunting for a replacement

    The criteria for my replacement would be pretty simple:

    • Consumer router with high performance. If I could not find a decent consumer router, then I was not against using an enterprise setup or prosumer setup. I really wanted a set and forget sort of system for my smart home.
    • Most Important: High 2.4GHz simultaneous client count.
    • Reputable company
    • Newer standards (Wi-Fi 5 at minimum to match the AirPort it was replacing or Wi-Fi 6).

    The Options
    Netgear
    – This one was ruled out almost immediately as their only official documentation on the website stated a 32 client limit per band across their entire lineup. I believe that this has changed recently, but it was still concerning to see it in the knowledgebase.

    Synology
    The RT2600AC and MR2200AC seemed like good candidates. Their website explicitly stated that they tested simultaneous client counts in the 100’s on each access point. I emailed them and received a response that there is no per-band limitation (I’m guessing 128 would likely be the line). Very impressed with their response time and that they explicitly stated their simultaneous client count tests (as a high number of simultaneous clients on the 2.4GHz band was the most important factor for me)

    AMPLIFI
    I am a huge fan of Ubiquiti and their consumer lineup interested me. I didn’t want to maintain controller software, AP software, and gateway software. This meant the AMPLIFI line was my best bet. They don’t list simultaneous client specs anywhere and seem hesitant to give any concrete numbers; however, anecdotal evidence on the internet had many users with 70+ Wi-Fi clients on the AMPLIFI Alien.

    The First Choice

    I originally chose the Synology RT2600ac. It was shipped by Amazon from their US warehouse (since I don’t believe the RT2600ac has Industry Canada certification, which I discovered a little later). It wasn’t the prettiest router, but it ran a familiar Linux OS with their SRM software on top of it. Upon initial setup, it worked well and I was very happy. Most importantly: connected over 32 clients to the 2.4GHz band. Success!

    Over the course of a couple of weeks, I was having some issues with some VOCOlinc light bulbs and devices. I couldn’t get them to remain connected and had trouble identifying the cause. Wi-Fi standards implementations are never 100%, especially in IoT devices and this was likely the cause of what I was seeing.

    I could get a ton of clients connected to the 2.4GHz, but some devices had some weird connectivity problems with no discernible pattern. Ultimately after a lot of troubleshooting and configuration changes, I ended up returning the router to Amazon in favour of an AMPLIFI Alien.

    AMPLIFI Alien

    I had the AMPLIFI Alien set up in no time (what a great little app) and was able to get all my devices connected to it over Wi-Fi (well over 32 clients on the 2.4GHz). As of writing, I have about 70+ clients connected to the AMPLIFI Alien and the connections are rock solid. My smart home network has continued to grow with the AMPLIFI Alien as the sole router solution and has handled the growth flawlessly. The ability to block IoT devices from the internet with a simple interface is an added bonus (since I exclusively use HomeKit cameras and products and don’t want the devices to be able to directly access the internet).

    Very rarely do I find a product that really gives me the confidence to recommend it without hesitation, but the AMPLIFI Alien really is one. It has turned my HomeKit home into a rock solid smart automation paradise. The router has great aesthetics and just looks cool. It’s managed by an app that exposes most settings you’d ever want to mess with in a consumer router. It plays really well with Apple devices and scales well with a large number of clients. It can also be meshed with additional AMPLIFI Alien units.

    If you’re looking for a reliable, simple, and powerful router for your HomeKit home: the AMPLIFI Alien may be a great fit. I’ve been using it for a little over a year now and it’s been rock solid while I continue to throw more devices at its 2.4GHz band.

  • Stanley/Whistler UT351 Limit Switch Replacement

    We currently have a Whistler (Stanley/Genie series) UT351 screw drive garage door opener and it has been in need of some repairs. Since the garage door opener has been rock solid reliable, and it’s connected exclusively to a HomeKit Garage Door Controller Accessory that I developed (so all garage door commands are sent encrypted through HomeKit), we decided that it’s best to repair the opener that’s worked for so long rather than gamble on a new brand.

    We repaired the motor coupler… However, there was another issue: all of the limit switches broke so they were being held to the track with a sophisticated mechanism of duct tape and carpet tape. This worked pretty well, but was becoming slightly problematic occasionally and required readjustment. Pretty problematic since if the limit switch slips, then the door will slam into the opener or into the ground with pretty decent force. We decided it’s time to replace these limits witches.

    The issue: discontinued

    Garage Door Opener Replacement Limit Switch
    Part 36850

    When we spoke to some garage door part distributers and discussed the parts we required, we were informed that limit switches are no longer produced for our garage door. We were able to find someone who sold, what was supposed to be, drop in replacement limit switches for our model. These are the Stanley-compatible Limit Switches (Part #36850). We ordered two of these and thought we were golden

    Surprise 2: our limit switches are wired together

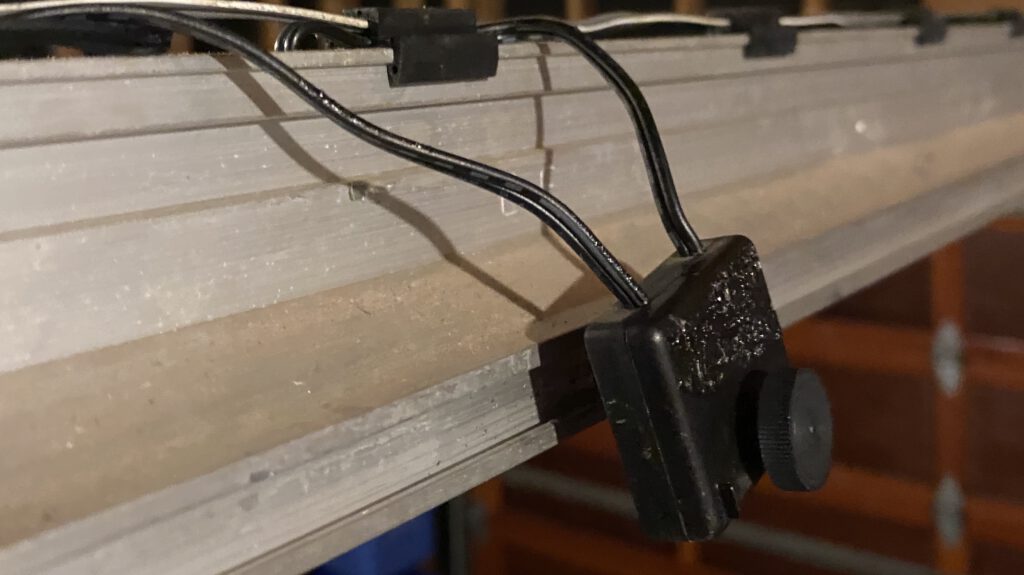
    Original limit switch - one wire into opener and other wire proceeds to next limit switch

    This one surprised us during the switch. Our limit switches are wired together in sequence and not independently wired back to the opener (i.e. one wire proceeds down connecting both limit switches, with only one wire returning to the opener from the closing limit switch). We thought maybe this was expected, so we installed both switches in place of the existing wires.

    Plugged the opener back in and: surprise surprise… the opener started throwing an error indicating the limit switches were not connected. This made sense since the circuit would have to be completed for the opener to function properly, and this method of installing did not make that happen. The circuit could never complete since the reed switches would never be pulled closed at the same time.

    The fix: resistors to the rescue!

    To get these limit switches working, we’d need to complete the circuit by adding resistors to both limit switches between the wire coming into the limit switch and heading onto the next switch (or the opener in the case of the down switch).

    We used 5% resistors: 1.3k Ohms (first/up limit switch) and 2.2k Ohms (last/down limit switch). Rewiring is pretty simple:

    • Connect the wire from the garage door opener into the first/up limit switch lead wire. Also connect the 1.3k Ohms resistor to this wire connection that’s just been made.
    • Connect the last wire of the first/up limit switch to the existing wire heading to the second/down limit switch. Also connect the 1.3k Ohms resistor to this wire connection.
    • Connect the wire from the first limit switch into the second/down limit switch lead wire. Also connect the 2.2k Ohms resistor to this wire connection.
    • Connect the last wire of the second/down limit switch to the existing wire heading back to the garage door opener. Also connect the 2.2k Ohms resistor to this wire connection.
    New limit switch installation
    Excuse the mess here. This was simply a test to see if the theory works. The final connection will be much cleaner (and should be in your case as well)

    Hopefully this assists in wiring new limit switches to the the older screw-drive Whistler/Stanley/whatever other brand they sold this UT351 opener under. Remember: you’ll be using the existing wire coming from the garage door opener to the first limit switch, and the existing wire going from the final limit switch back to the garage door opener. Keep that in mind when cutting the old cable and using the crimp connectors. Make sure both wires in the new limit switches have a resistor that ensures the circuit can always complete.

  • Looking forward

    What’s he looking at, anyway?

    Fresh off the heels of the WWDC20 Keynote, I figured it’d be a good opportunity to provide a little bit of an update on some of the apps I currently maintain. I’ve already made a commitment earlier this year to focus on modernizing my apps codebase.

    Considering the huge announcement that Apple let loose regarding the shift to Apple-based SoC’s for Mac (and the move away from the macOS/OS X 10.x naming scheme), I wanted to provide a little insight into my current plans for existing apps (which is a relatively big undertaking, albeit not as big as the one Apple has planned for their Mac lineup!)

    You can skip all the details and see an overview of the plans
    Click the link above for a brief rundown on the plans for the apps

    Speech Jammer
    Speech Jammer 5.0 was released earlier this year after quite a bit of testing and development. It utilizes an entirely new audio engine and added a few big features to help make sharing easier. However, the focus of Speech Jammer 5.0 was modernization. For example, 5.0 moved the app to a more modern core that allows the app to utilize proper multi-tasking support. This means that users can now leave the app and continue to experience the app, even with it closed.

    Speech Jammer 5.0 was just the beginning. Although there were many optimizations and many new features added in 5.0, my plan for Speech Jammer 5.x is to re-write many parts of the app for efficiency and to make sure that it’s ready for the future. The primary goal here is to move Speech Jammer entirely to Swift. Essentially, 5.x is a period of refinement.

    The real work that went into Speech Jammer 5.1 is under the hood. While some components of Speech Jammer were written, or re-written at some point in Swift (namely the tongue twister feature, the FAQ system, the support system, and shared link feature), most components are still based in Objective-C. This isn’t inherently a bad thing at all, but the codebase is getting a little long in the tooth and could use some cleanup beside an overhaul, and this is a perfect opportunity to move Speech Jammer onto a modern programming language and have it better aimed for the future.

    Speech Jammer 5.1 and the move to Swift
    Speech Jammer 5.1 is scheduled to be released very shortly some new features and reliability improvements. Notably, it adds a new options system that allows customization of many features of the app. It also allows users to use the microphone on their Bluetooth headphones (or, using the new options system, use their devices microphone for the highest quality audio). There are a lot of other options and feature requests that were implemented in this upcoming update, but we’ll discuss that in the update blog post when it’s released.

    Speech Jammer 5.1 brings most parts of the app completely into the Swift world. The recordings service, sharing service, archiving service, and file management service have all been completely re-written in Swift (including the UI controller). This also brings some major efficiency improvements that can be felt throughout the app.

    Speech Jammer 5.2 and beyond
    Speech Jammer 5.1 should be released shortly, and it brings with it a new deployment target of iOS 10 or later. It is almost entirely written in Swift (sub the main core), and lays the groundwork for the future. Speech Jammer 5.2 is also under development for release later this year, which will (hopefully) have the entire app completely moved over to Swift with a new codebase. Of course, there will be new features available with it, but the focus of this post is to provide a little bit of an update on the big transition I’ve been working on.

    By moving to Swift, I can make sure that the app is ready for the future. This means I can quickly implement new features in new versions of iOS, and make sure that the app is using the fastest possible libraries.

    New Start Usage Meter icon for macOS

    Start Usage Meter
    Usage Meter for the greatest ISP ever
    Start Usage Meter is another project that I’ve wanted to focus a lot of my efforts on. I’ll have some more updates on it shortly; however, I’m pretty happy with where it is right now. Version 2.5.7 will be released within a few weeks containing some very minor tweaks and enhancements.

    There are a lot of pieces of Start Usage Meter that use outdated or deprecated practices. For example, it doesn’t use base localization, it uses some heavier API’s, and doesn’t have a single line written in Swift. These decisions were all intentional in an effort to offer full support going back to OS X Lion. It still provides a really modern app experience on the latest operating systems, but will still run on OS X 10.7. I would still like to move it onto a more modern codebase (written in Swift) and update it, and am currently deciding the best approach. Any changes to the deprecated practices I’m currently using, will likely mean a deployment target of OS X 10.8 Mountain Lion or later.

    Moving Start Usage Meter forward
    My current plan is to test, release, and sit on Start Usage Meter 2.5.7 to make sure it is running smoothly and without issue. At some point after its release, I am going to stamp Start Usage Meter 2.5.7 with the “battle-tested” sticker and fork it, effectively creating two separate app builds. At that time, Start Usage Meter 2.6 will be born and will be a more modern version without support for the oldest versions of macOS. It will gain all the new features which, if possible, will be ported back to the 2.5.7 version and made available through my website for those on older versions of OS X. Otherwise, 2.5.7 will receive bug fix build updates only.

    I don’t have a date in mind for this yet; however, I did want to make it clear that 2.5.7 will still be available through my website as a signed, sandboxed, and notarized app. It will receive updates alongside the new versions (which may contain new features, or just back ported bug fixes). Version 2.6 and later will still be distributed through the Mac App Store and will be the best experience you can receive, so if you can run it, stay on that build path. Start Usage Meter 2.6 will also support Apple Silicon-based Mac’s natively and will also support macOS Big Sur along with the UI improvements that come with it.

    Summary of plans

    Speech Jammer

    • 5.x has a goal of refinement and improvements. Building a stronger codebase for the future
    • 5.1 will be released and will have transitioned most of the app to Swift
    • 5.2 will have the entire app using Swift and modern API’s
    • 5.1 and later will require iOS 10 or later (this is potentially a moving target)
    • I plan to support the app on Apple Silicon-based Mac’s
    • The goal of Speech Jammer 5.x has always been to modernize the codebase, and that work will continue through the 5.x release cycle.
    New Start Usage Meter icon for macOS

    Start Usage Meter

    • Start Usage Meter 2.5.7 to be released shortly with tweaks and enhancements
    • Start Usage Meter 2.5.7 (after extended testing) will branch off into a separate release cycle with support going back to OS X 10.7 Lion
    • Start Usage Meter 2.6 will be created and updated through the Mac App Store for more modern versions of macOS
    • Mac App Store version will support Apple Silicon-based Mac’s natively and macOS Big Sur UI changes
    • 2.5.7 will receive back-ported improvements and will be distributed as a signed, notarized app on my website for versions of macOS going back to OS X 10.7 Lion.
  • The importance of a vacation or a break

    As I continue to move forward (at least I’m hoping this is forward), I notice that there are a lot of people that just don’t seem to see the value in a vacation. Ever since I was young, my family and I have taken yearly vacations to the Caribbean. Although as a kid, it was just really cool to go to a tropical destination for a little while and take a break from this cold harsh weather we have in Canada.

    However, now that I am a little older, I see that it means so much more to me now. It is no longer just a break from the weather, but rather a break from reality as a whole. The vacation gives something that is planted and firmly placed in time to look forward to. It is the light at the end of the tunnel when work starts piling up. It’s a chance to throw all worries away and get away from everything. I realize the importance of a vacation now more than ever before. You have to enjoy life, and part of that (for me anyway) is putting your hands in the air and leaving your desk behind for a week with no thoughts about what you were just doing.

    A vacation is vital in a successful career. It sparks passion and gives you a chance to think about potential ideas without being required to think about them for lucrative reasons. I generally head back home with a new smile and a new chance to build something truly spectacular that I enjoy. Moreso, it renews my excitement for what I do.

    Maybe it’s just me… maybe it’s a sign that what I am doing needs to change more frequently so I don’t fall back into that rut. However, it seems like a getaway every year ensures that my passion for what I’m doing is renewed.

    If you’re ever feeling dull or like you’re stuck in the same-old same-old routine, hop on that next plane to a sunny destination. I suggest Royal Caribbean! Sail away!

  • We create the world

    The best part of my profession is that we can create whatever our heart desires. If it doesn’t exist, we can bring it into existence.

    Our home is protected/monitored by both cameras (motion activated) and a central station. This camera notifies us via email whenever motion is detected along with data from the motion. This system works fantastically, but we came across a bit of a nuisance factor. Whenever we bring in the groceries or do something that involves walking in front of the camera multiple times, we’re left with dozens upon dozens of notifications.

    My solution: to only activate the camera when our homes security system is turned on. There is no feature to do this out of the box, so I had to get creative. The best part of programming is the ability to logically figure things out and create functionality where none exists.

    I did this by getting my monitoring company to notify my server whenever the system is armed or disarmed (securely), and send some information. The server takes this information in, analyzes the situation (for example: are we gone or home, are we secured?) and stores the knowledge in a secure file. Whenever the camera detects motion, instead of emailing us, it now sends the email to my server. The server grabs the email content with images/data and checks the status of the alarm. If it is armed, the motion is probably of interest to us and it is sent on its way. Otherwise, the server throws out the message and just places a log of the data in a file for later viewing if necessary.

    This is an unofficial method to a problem that both companies have not solved (which is fully understood, since they’re unrelated). They both simply had some tools that I found a use for. One of the best parts of being an artist/programmer is the ability to solve problems where other people may go “someone should do that.”

    It’s really a great profession.

  • Crystal Clear Retina

    Update: Innisfil Dental Centre’s website is now updated with Retina support!

    I finally went through and updated my entire site to Retina-ready images. It was a bit of a bigger effort than I had thought (even though there aren’t many resources that needed to be upgraded).

    Why?

    Icon is from Analog, a really cool app. Check it out!

    The decision to make my website Retina-ready came from me browsing other sites over the past little while and realizing how much better websites that were Retina-optimized looked on my laptop. It had a massive impact on my opinion of the company/person who owned the website. For example, a software company was much more likely to get my purchase if they had a Retina based website. When going back to check in on my site (a whole re-write is in progress as well, hopefully launching within the next month or two)– I had noticed that my website looked dreadful on Retina displays (and decent on non-retina displays).


    How?

    I decided to re-write my pages to use divs for images instead of  tags. This allowed me to make use of WebKits new CSS4 image-set rule (-webkit-image-set). This makes it easy to serve up non-Retina images to non-Retina displays, and Retina images to Retina displays without wasting bandwidth. My previous Retina implementation involved sending pixel-doubled images to all users (@2x). This resulted in more bandwidth used, and scaling down being done on non-Retina displays which made the image look awful. I now have two versions of every image on this site. One at regular resolution, and one @2x the resolution.My whole website is now Retina optimized with all images using div’s and the -webkit-image-set property. This means that the Retina imagery is only available on Safari/Chrome/other WebKit based browsers at this time. Other browsers do not currently support the image-set implementation. Therefore, if you’re using a browser other than a WebKit based browser, you’ll be served a non-Retina image regardless of your display.The other benefit of this approach is that it will render and update dynamically based on the screen you’re using. For example, an external monitor that’s not Retina will show the lower resolution image. However, if you drag at least 50% of the browser over to a Retina display on the same machine– the browser will load the high resolution images without reloading the page.

    Where am I taking this?
    I plan to make all future websites, and updates to this site– Retina ready. It really makes me look better as a developer, and allows me to be happy when looking at my own site. I also plan to bring these changes over to some freelance websites I’ve done, including Innisfil Dental’s website.

    What? Retina?! What the heck is that? And why do you need to optimize?
    A “Retina” screen is a screen where the human eye cannot discern pixels at a normal viewing distance. Retina displays run at double the resolution, or 4 pixels per CSS pixel. This means that if a website is serving a 300×300 picture, a Retina display is actually rendering that image at 600×600, scaling up. This would result in a seemingly blurry picture on these ones since WebKit needs to guess the additional pixels it’s missing. Websites should detect the screen pixel multiplier, and serve the appropriate image (300×300 to non-Retina screens, and 600×600 to Retina screens).

    I am still experimenting with this, but please contact me if you have any input.

    Retina Comparison Image
    Comparing a non-retina image to a Retina image (2x the resolution)